The Care and Feeding of
Sourdough Starters
by Joe Jaworski
The key ingredient in bread that makes it swell up into a large and delicious loaf is yeast. These living organisms are a type of fungi that are very common throughout the world, and can be found in the atmosphere and on most surfaces. The species and strains of the Saccharomyces cervisiae is the exact type of yeast organisms used for fermenting bread and alcoholic beverages such as beer and wine. Many people take yeast as vitamins because it is 50 percent protein and a rich source of B vitamins, niacin, and folic acid.
Most breads baked today use a commercial yeast culture (such as those from Red Star or Fleischmann's) in bread recipes. These types of yeasts have been genetically engineered for taste and more importantly, for repeatable, stable performance in a bread factory. Before commercial yeasts were available, wild yeasts were used for all bread baking. These yeasts are called sourdough yeasts. In a sense, all breads were once sourdough.
The sourdough or wild yeasts have very different characteristics than the genetically manufactured varieties. Sourdough yeasts can survive a much wider temperature variation, can live in acidic environments (the tangy taste), and can remain dormant for a very long time. They also taste very different; giving sourdough breads their unique flavor and chewy texture.
Purchasing Sourdough Yeast
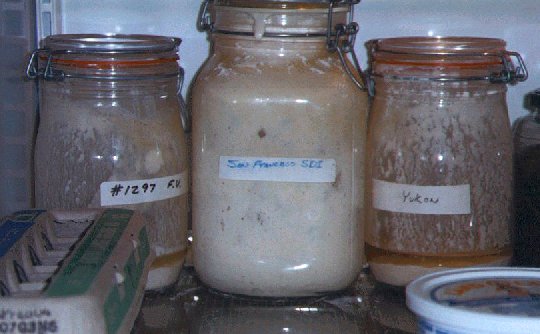
Most larger health food stores and gourmet shops sell sourdough yeasts in dry form. These sourdoughs are typically marketed by region of origin (i.e., San Francisco, Yukon, Middle East, etc.) and can vary tremendously in characteristics and taste. On the net, Sourdoughs International sells different types of starters by mail order. If you are new to sourdough baking, I recommend that you start by trying one of these. This will give you a good feel for working with sourdough yeast and learning about its baking characteristics.
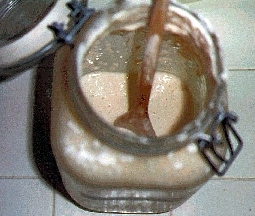
Once you have your sourdough starter thriving, you never need to buy it again. To culture any dried yeast, add it to a cup of flour and 3/4 - 1 cup of water. Stir vigorously to try and get some air into the mixture. It should have the consistency of pancake batter. Place the mixture in a warm place (a gas oven with a pilot light or electric oven with the light bulb turned on). Let it sit for 2 - 12 hours. The mixture should become bubbly.
It's a good idea to mark the batter level with a piece of tape or post-it note and then use a credit card or similar plastic to scrape a "window" on the jar. This lets you measure the amount of rise/bubbles in the starter as ell as seeing if you missed the peak. The goal is the get the starter to rise a minimum of 2 inches within several hours after adding flour and water. If it doesn't or takes way more time, add another cup of flour and water and start over. Keep doing this until the starter is very active.
After removing the quantity needed for the recipe, place it back into the refrigerator. Cap the jar but keep it loose to allow air to enter and CO2 to escape. This will preserve your starter until the next time you need it. I have left starter in the refrigerator this way for up to a month with no problems. If you must go longer than this, remove the jar every few weeks or so, dump out most of starter, and add another 1 cup of flour and water to the mixture. Never keep you starter tightly closed as gases can build up pressure and may cause the jar to crack.
Using this procedure, you can keep your starter alive indefinitely. However, every few months or so your starter jars will acquire caked-on flour near the top of the jar. This could get moldy and ruin the starter. I usually wash out the jars every few months to prevent this, carefully saving the starter in another jar during the washing, then returning it to the jar and to the refrigerator.
Preserving your Starter
It is a good idea to preserve some of your starter in case something goes wrong. If your starter dies, you will have to purchase or get some more yeast and start over. Some people keep two batches going at once, but I have developed a method that can be used to preserve the starter for a long time without constantly adding flour or water. This method also makes it easier to share your starter with your friends.
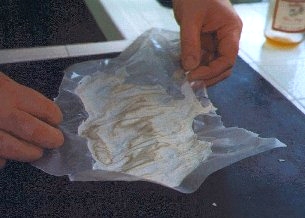
During the normal course of preparing your starter for bread baking and when it is active and bubbly, add flour and yeast as normal for its next feeding. But before returning it to the refrigerator, pour a few ounces of the starter onto some wax paper and spread it out it with the back of a spoon so that the starter forms a thin layer on the wax paper. Let it completely dry out overnight. The next day, bend the wax paper and the starter will break apart like potato chips. Place the starter chips in a plastic zip lock bag sealed tightly and then into the refrigerator. It is also a good idea to write the date and type of yeast on the outside of the bag.
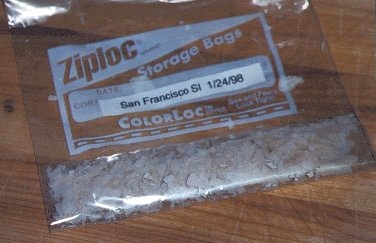
I have kept starter this way for up to six months with no ill effects, though I suspect you can probably go up to year. To reactivate it, place the starter chips in equal amounts of flour and water and put it in a warm place for 12 hours. I make these starter chips about twice a year to ensure I have a fresh backup for all my sourdough starters.
Stalking the Wild Yeast

As an alternative to purchasing yeast cultures, you can capture a wild yeast right in your own backyard. You may discover a delicious and wonderful sourdough unknown to the world! You may also discover a bland one. Either way, give this a try because it's fun and will add a little adventure to your baking.
To capture wild yeast, place one cup of bread flour and one cup of water in a glass jar. Cover the jar with a fine mesh (a knee-hi stocking works well) to let air in but keep bugs out. Place the jar outside where it can receive some fresh air and some breezes. Best location is a shady spot. Let it set for three or four days. Stir one or twice a day. If it is cool outside ( 35F(2C) to 60F(16C) ) you will see very little or very low activity in your starter until you bring it indoors and warm it up. If it is less than 35 deg F, wait until warmer weather before trying to capture yeast. If the starter turns pink or dark grey in color, it has become moldy and you should discard it.
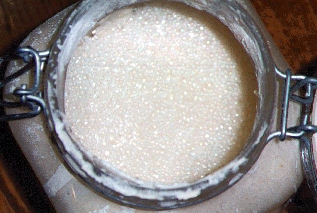
If you see no bubbles in the mixture after a few days, discard it and try again. If you see a layer of bubbles on the surface of the mixture, congratulations! Feed the yeast with another cup of flour / water mixture and let it ferment indoors for another 12 hours or so. After that, try an experimental loaf. Even though you may not live in a place famous for sourdough, you will be surprised how tasty native yeast can be.
![]()
![]()
Copyright (c)1998-2018 Joe Jaworski. Reproduction by any means is strictly prohibited without permission.
I am not affiliated with any brands or product names mentioned on this web site.